Crushed Stone Base 

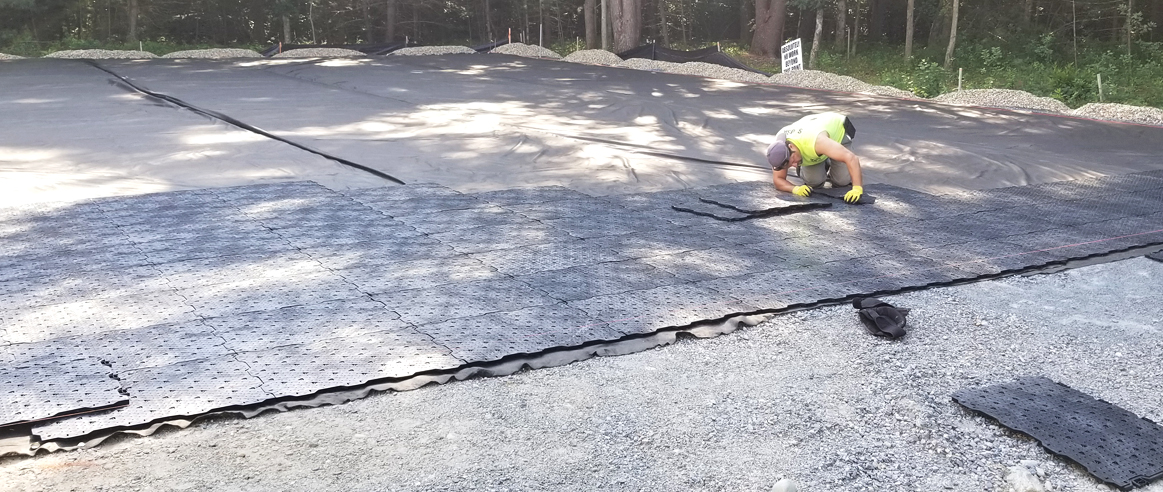
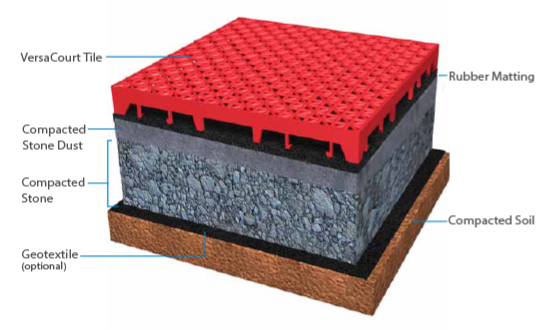
While not ideal for every type of court, there are instances when costs, ordinance restrictions or permeable surface limits require our customers to consider a compacted, crushed rock base.  We offer a unique recycled rubber underlayment product for placement between the rock and the tile and recommend that balls be slightly overinflated to accommodate for the softer surfacing. **VersaCourt does not recommend utilizing a stone base for Pickleball or Tennis applications.

Download Crushed Stone Base PDF

Stone Base Recommendations

Stone Base

  • 1. Mark court layout on the ground. Be sure to check for underground obstacles like sprinkler systems, power lines and septic systems. Also look for overhead obstacles like trees and overhead power lines.
  • 2. Remove sod. Using a sod stripper remove the sod and save some to be used over the back fill around the court after the base is installed. Remove at least 2’ beyond the forms to allow for tapering the back fill after the base is finished. A tiller can also be used and then organic material removed.
  • 3. Compact ground. Using either a ride on roller or a plate compactor, compact the entire surface.
  • 4. Set forms. The easiest way to set forms is to use a Laser Transit to set the height of the forms. The forms may be set level or at a .5% grade. If a grade is desired then make sure it is in the proper direction (ex. away from the house). Use 2’x6’ treated lumber or an equivalent for forms.
  • 5. Roll out and stake down Geotextile material using sod stakes every 6’.
  • 6. Add 2” – 3” crushed stone, 3/4” minus crusher run. If the ground is not level use the crushed stone as fill. Do not use soil as it will settle. After compacting this level you should be between 1” to 2” from the top of your forms.
  • 7. Water and compact. Spray water over the crushed stone before compacting, this will help the stone compact better. If the stone is already wet watering may not be necessary.
  • 8. Apply 1”-2” stone screenings 1⁄4” minus. Fill to the top of the forms. Water and compact.
  • 9. Level stone screening using the speed mover and drag mat (or other devices).
  • 10. Use hand roller for final compaction.
  • 11. Back fill around forms.
  • 12. Once the stone screenings are smooth and level apply rubber matting.
  • 13. VersaCourt tiles can then be assembled on top of the rubber mat.


Dream Court Designer

Your Court, Your Design

Design Your Own Dream Court

With our interactive court designer, you can create the court of your dreams. Mix & match colors, add game lines and accessorize.

Start Designing